The myCourses text editor has been updated to take advantage of responsive design, and to make it easier to use. Significant differences are explained below.

You may notice that the toolbar changes with the width of your screen or browser window. This makes it easier to use on smaller screens. The controls move down to the next row if there is not room to display them. The toolbar will never be clipped.
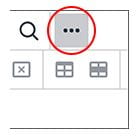 |
Use the More… button in the upper right to expand or collapse the toolbar. This replaces the Show More |
| Highlight text, then use the Clear Formatting button to remove unwanted formatting, and set the text to the default style. This replaces the eraser |
|
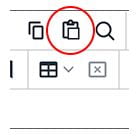 |
When you paste formatted text from Word or other programs, myCourses asks if you would like to Remove Formatting or Keep Formatting. Choose Remove Formatting to keep your text consistent and professional. |
 |
The Insert YouTube |
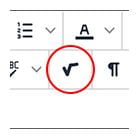 |
The Insert Math Equation button has replaced the Launch Math Editor |
 |
The Accessibility checker is built into the toolbar. Be sure to use it on all of your course content! |
Additionally, text entered into the editor appears in a dark gray color, with no spaces between adjacent paragraphs.

When your content is saved and published, text appears black, and space is added between paragraphs.

Frequently Asked Questions
How do I insert an image?
- Click to place the insertion point at the desired location.
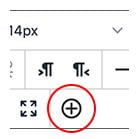
- Click the Add Content (+) button.
The Add content dialog box is displayed. - Click to select Insert Local Files.
- Navigate to the picture file on your computer, and click to select it.
The image is added to your content.
How do I insert a video I have on my computer?
- Click to place the insertion point at the desired location.
- Click the Add Content (+) button.
The Add content dialog box is displayed. - Click to select Insert Local Files.
- Navigate to the video file on your computer, and click to select it.
The video is added to your content.
How do I insert a YouTube video?
- Click to place the insertion point at the desired location.
- Click the Add Content (+) button.
The Add content dialog box is displayed. - Click to select YouTube Video.
- Type your search terms into the field provided, then click the Go button.
- Click the Select button below the desired video thumbnail.
The Create Mashup Item dialog box is displayed. - Make any settings changes as needed, then click the Submit button.
The video is added to your content.
How do I clear formatting from text?
- Highlight the desired text.
- Click the Clear Formatting (Tx) button.
You must be logged in to post a comment.